TurtleCraftyGirl

Monday, August 11, 2014

Rustic Log Succulent Planter


This summer was one of my most active ones, especially when it came to maintaining my garden. My mother would be so proud of me :). My OH is actually very impressed this year because until now, he was convinced that I had a black thumb. So, as I saw my plants doing well this summer, it gave me motivation to make some interesting planters especially for my succulents. 


I had this log with me from over an year, all polished and ready to go. It has a finish of polyurethane on it, which protects the bark. For converting it into a succulent planter, it needed a 2 inch deep hole(as per some sources online). But without proper tools, I could only make it as deep as 1 inch. We shall see in due time if this was deep enough or not.

Added some cactus potting mix, and a baby off one of my hens & chicks plant.


Happy Gardening! 

Saturday, August 9, 2014

Wild Kratts Rakhi


Rakhi or Rakshabandhan is just a day away. Rakhi is an Indian festival in which a brother and sister celebrate their love and strong bond. Sister ties a Rakhi (sacred thread) on her brother's wrist, and brother vows to protect his sisters lifelong.

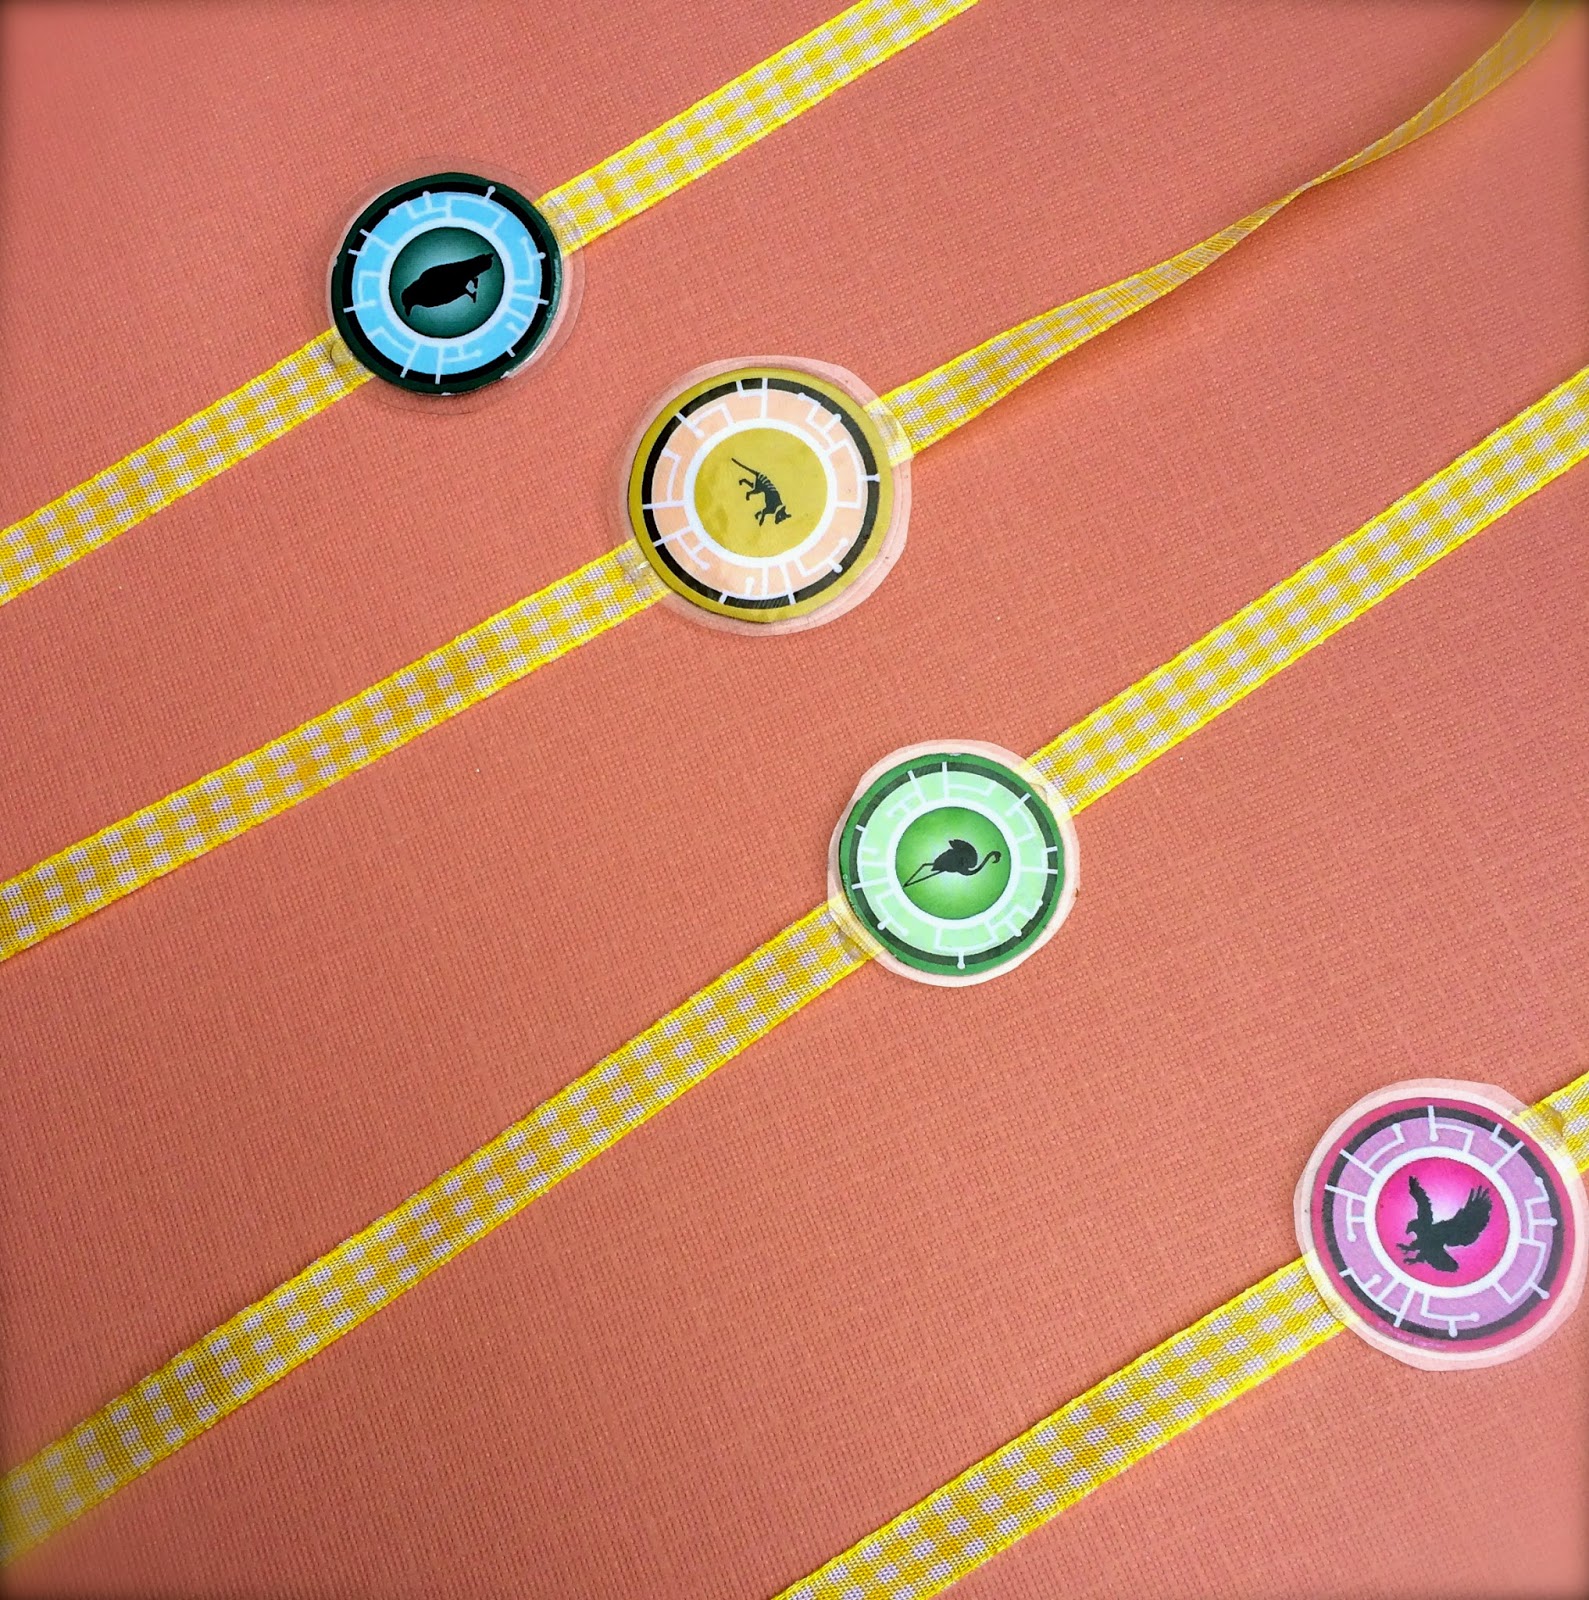
This year, I was struggling to come up with some fun idea for younger kids in our family, until now. Oh, I am so excited. A Wild Kratts Rakhi with a creature power disc on it. Which Wild Kratts fan would not love it.

There were still some creature power discs that my son did not already have. I looked for them online and found most, except for the Tasmanian Tiger. So, I ended up making just that one, rest pulled from the internet.


Took a print out of all the discs on a thick cardstock, and got it laminated from a store nearby. These discs were smaller(1 1/2 to 2 inches) than the regular size. Using a glue gun, attached the discs to a ribbon or thread. And its done. 


Well, my brothers and cousins got a much simpler Rakhi this time.

A very Happy Rakshabandhan to all my dear brothers and cousins.


Monday, August 4, 2014

Summer/Pool Birthday Party


My little munchkin turned 2 last week. She is one girl who has been preparing for her birthday for a very long time. Her favorite pretend play is to build a birthday cake with lego blocks and repeatedly blow candles, and at the same time, singing the birthday song for herself. 

With just a week to prepare for her party, and after some brainstorming with her brother, we finalized the fish/ocean theme for the party based on her favorite sleep buddy: clown fish, and decided to add kiddie pools and slip & slide for summer fun. 

With not much time at hand, it was the first time I did not post the invites for the birthday party. We just did a simple evite. Well, there is always a first time. 

On the day of her actual birthday, I baked a small cake, and her brother decorated it with air filled water balloons while she was taking a nap. Its a different thing that the balloons started popping when we lit the candles. By this time, Miss M did not care about the candles or the balloons and all she wanted was to take a big bite of the cake. So much that her brother got worried that she would not let anyone else have that cake.


For the party, which took place in our backyard, I had big plans of decorating. I thought I would start the decorations a day in advance, but the rain gods decided to bless us until few hours before the party. So, I did whatever I could in an hour. Reused the paper lanterns and some felt bunting.


Here's the cake table.


For the cake, I made the clown fish topper out of fondant along with some sponges and corals. There was also a star fish, but it did not make it to the party. K (M's brother) decided to check it out a day before the party, and it broke into pieces. One of the fish's fins also broke at that time. I did make another one before the party, but it lost in between the party chaos. So, our little topper has one missing fin. I am sure M did not mind.


Another look with some shells and coral decorations.

I wish I could make the fish smile a little bit more.


Maya's favourite marshmallows: coated with candy melts, brown sugar(for sand) and gold fish.


Chocolate cupcakes. I decided to go with the mini cupcakes to avoid any wastage.


Fun Fun


Birthday girl enjoying the fish suckers. I really doubt if any other kid got to try one as I think Miss M ate most of these.


Ice Cream time


Party Favors: Swim Goggles, stcikers, bubbles in watering can

Back to more fun...

This was by far the most fun birthday party. The moment the party started, I did not hear much from the kids. I did not organize any games as there was plenty to keep the kids busy. We literally had to drag the kids out of the pool and trampoline to cut the cake. 

A very Happy Birthday to my little dare devil.
Thursday, June 12, 2014

Summer Berry Cake


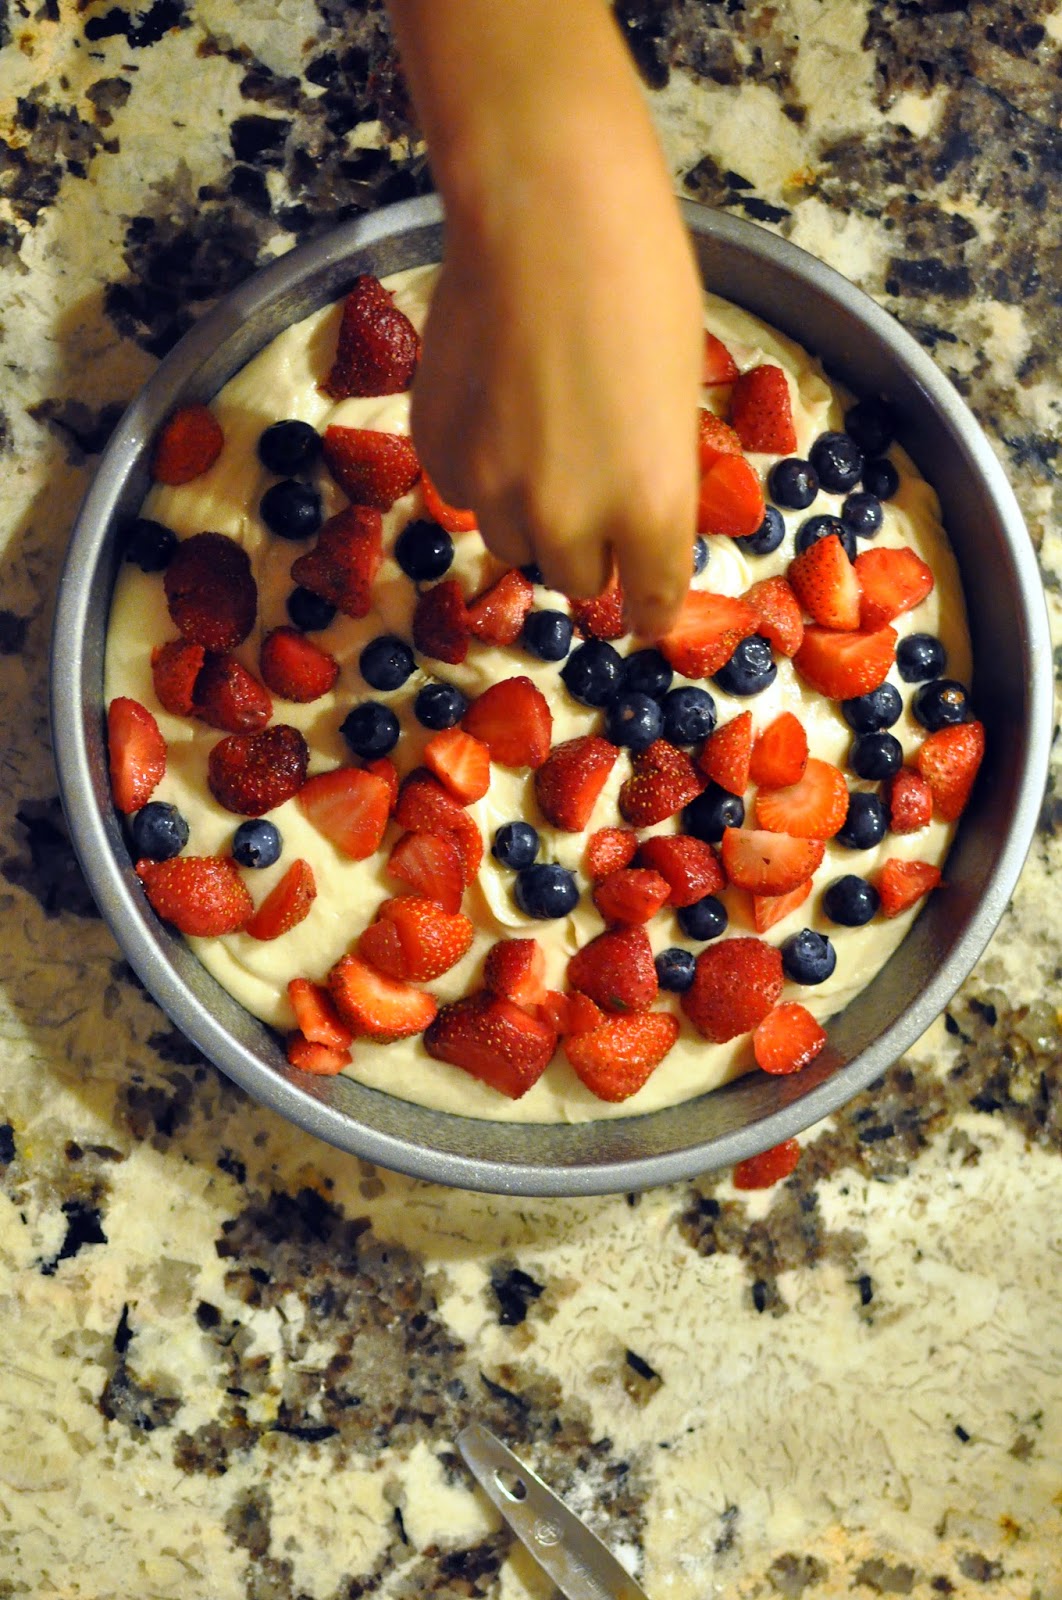
Today we celebrated our 9th Wedding Anniversary. It was a nice relaxing day(after a very long time), and we ended it with having this beautiful cake which my older son baked for us(with Mommy's help of course). I had almost given up the idea of baking today, but he did not. Right after my little one slept, he reminded me that we still have to bake the Anniversary cake. I could not bring myself to say no, and I am glad I did not, because it were the best 2 hours spent. He wanted to do everything on his own, from measuring the ingredients, mixing the batter, some licking in between, and of course his non stop commentary. My husband sat in the background enjoying the whole show. 

We still had some strawberries left from our last week's Strawberry picking at a farm. So, this cake from my favorite cake blog Call me a cupcake, fit our need perfectly.

My boy getting the mixer ready.


Adding the berries.


Waiting after the cake went in the oven.


We had to eventually convince him to go to bed as it was getting late in the night, and he could have it as his breakfast tomorrow morning. He was not really happy about it, but 'being difficult' is not a word in his dictionary, so off he went. 


Rohit and I could not wait until tomorrow. After all, the anniversary is today.


I cannot wait to share this cake with kids tomorrow morning.

Looking forward to getting older with my best friend, and hopefully enjoying kids baked cake every year.

Happy Baking!

Wednesday, June 11, 2014

Pillow Case Dress


My daughter really inspires me to make dresses for her. I never thought I would enjoy sewing that much. At least for now, I do love it, especially when it takes less than 2 days to whip out a dress for my little munchkin.

I bought this fabric long back on a sale at Joanns. Loved the animal print on it. This was before Miss M was born, and I was getting all ready for her. Back then,  I made an  baby dress from the pattern at Itty Bitty baby dress from this fabric, and she must have hardly worn it 4-5 times. Babies grow up so fast. Realizing this, I was little discouraged from sewing anymore until she was little more grown up. Fast forward 2 years, I think both her and I are ready to dance around comfortably in light airy dresses.


So, knowing my limited sewing skills, I am sticking to simple patterns, much to the disappointment of my mother. She is a perfectionist and liked to make the most beautiful intricate dresses for me and my sister when we were growing up. We had matching purses to go with the dresses, decorated belts, handmade buttons, and hair accessories. On seeing the simple dresses that were being made for her precious granddaughter, she offered to send me her pattern book.. Well she would have to do more than that.. maybe I can convince her to take a break from crocheting, and instead sew some of those frilly dresses for Miss M. Knowing her, I know I would never hear a No from her, so I have to be very selective of what I ask of her.

So back to the dress, here is the pillow case dress I sew for my darling little girl. I saw couple of tutorials on the net and eyeballed the measurements. But still posting a link to one tutorial here. Miss M loves to choose which side to wear in front each time: Hippo or Giraffe.  It’s great for the hot summer days.


I am thinking of making another one, but with a belt at the waist, which I think could make it more dressy.

Happy Sewing!

Tuesday, June 10, 2014

Father's Day Idea #2 : Handmade Keychains


This is a great craft which even younger children (4+) can make as Father's day gift. These key chains was completely my son's idea. He did the needle work on these star shaped plastic canvas that can be purchased at any craft store. It started as a part of stitchery work at his school. He loved doing it so much, that I got him few patterns for the summer. 

He liked these star shapes the most. These are around 4 inches, not too small, but can work as a key chain. He  chose all the colors for these stars, some were embroidery threads mixed with knitting yarn. 

We backed it with felt using hot glue. Added the keyrings, packed in small bags, and shipped all the way to India for Grand Pa.


Happy Crafting with your kids!

Thursday, June 5, 2014

Father's Day Gift: DIY Canvas Picture

Here is an idea for Father’s Day. A picture of grandkids on canvas for grandpa(Nanu).


I am super excited for this project. I have never gifted my Dad anything for Father’s Day before this, but this time, I decided to step up. It was never celebrated much while we were growing up, but now that we are far apart, it can serve as a reason to send some handmade stuff from kids/grand kids back home.  And knowing my Dad, I am sure he will love it.

For this you would need:


  • Blank Canvas
  • Picture the size of canvas
  • Modge Podge
  • Foam brush
  • Brayer or Roller


A while back, I had picked up three 12 * 12 canvas from the craft store on sale. They have been laying in my store for quite some time now,  and there is no better time to put it to good use than now.

On Picasa, I added the text to the picture, and used staples to get a 12 by 12 print on glossy paper. It is half the price from Walgreens.  Also, at Staples they will actually print the pic of size 12 by 12 or any size you need. At Walgreens, you would have to cut the picture to fit the canvas.

I also took an engineer print of the photograph without text for my home, and decided to try my hand at this process using this engineer print first. It cost me 0.60 cents for the engineer print.. Unbelievable!!! So if anything goes wrong(which it did), I would be prepared before I did the final version.

Step 1: I saw some pictures online where the edges of the canvas were painted. If you choose to do this, now is the time. I decided to skip this step.

Step 2: Using the foam brush, apply an even thick layer of modge podge on the canvas.


Step 3: Then stick the picture on the canvas. This step is easier with a thick photo paper instead of thin engineer print. With the engineer print, there were lots of bubbles formed. You can use the brayer or roller to remove these bubbles.  

Step 4: After the bubbles are out, apply another layer of modge podge on the top of picture, and around the edges of canvas, and let it dry.


In the engineer picture below, I did not use the brayer, and all the bubbles can be seen. It looks better after drying, but still its not as smooth.


Here is the one with thick photo paper. There were hardly any bubbles. Whatever were there, I smoothed it using the brayer.  This one looks perfect.


I noticed that even though it was harder to work with the engineer print(and its only in BW), the canvas texture can be seen through it because it’s so thin. And so, it looks so much close to the actual prints on canvas. I will post the results of Engineer print on canvas using the brayer, hopefully without any bubbles soon.

We wrapped the gift in drawing sheet from kid’s drawing table.  It had some random drawing done by kids. 


Added some handmade cards for Nanu, and its ready to be posted in this gift box from usps. Now hoping Indian Postal System would do its part and deliver in time.


Happy Crafting!
Oh.. BTW, if my Mom is reading this post, please let it be a surprise for Nanu Papa.  I know its going to be very hard, but try NaniMa:)

Friday, May 23, 2014

Knitted Hair Bows


Hands down, knitting these little bows, has to be my favourite project so far. It involves my biggest stress reliever activity : knitting, and especially uncomplicated knitting. I remember from a very young age, I could fill my hours doing nothing but knitting. The end result however wasn't  much, as all I wanted to do was knit straight lines. And if someone asked what I was knitting, I would simply say its something for my pet cat Kitty.

These bows are simpler than what I have ever done. From the scrap yarn, I knit small rectangular pieces(all rows purl), as shown below.


Then pinch it from the center and tie a thread around the middle. As simple as that.


On the back, either glue the clip, or stick it in through the center thread. From experience, glue works better, especially if the bows are worn by kids. As soon as my daughter realizes she has a bow in her hair, she wants to check it out immediately, and so the pulling begins. In such cases, glued clip holds better.


For variety, I tried another set with Seed stitch(R1 : knit one, purl one stitch, R2: purl one , knit one). And for the center, instead of a thread, knit a narrow string in a contrasting color.


Hope you get some ideas from this to use the left over yarn.

Update: I finally got a pic of Miss M modelling with one of the bows.


And soon she realizes that there is a bow in her head, and the pulling starts.


Happy Knitting!

Monday, May 19, 2014

Mason Jar Terrarium


This Friday was the last day of school, and we decided to thank the teachers at my son's school with these Mason Jar Terrariums. Both my kids had fun assembling these.


Except for the succulents, we had all the material from the Dinosaur Terrarium that we made 3 years back. We followed the basic directions of the terrarium as mentioned here. Kids enjoyed hunting for the moss in the yard for the project, which we added in addition to the Hens and Chicks succulent. 


I added a garden twine to hang the mason jars. Followed the directions here for hanging with twine.  To make the twine secure around the jar, I used E6000 glue.

For our own home, we made 2 planters out of it along with the terrarium, for the kitchen window.


 Thanks to all the wonderful teachers out there!
Related Posts Plugin for WordPress, Blogger...